
FuguHub
Manage Data Your Way
Using WebDrive with the FuguHub server
The following instructions are for: installing and configuring the WebDrive WebDAV client for connecting to your FuguHub server and for assigning a drive letter on your PC to your FuguHub server.
- Download and install WebDrive.
- Use a browser and navigate to your FuguHub server. We use realtimelogic.info in this example. You cannot use this server; you must navigate to your own server or the server you have been assigned to.
- Navigate to the internal FuguHub user interface, e.g., https://your-domain-name/rtl/
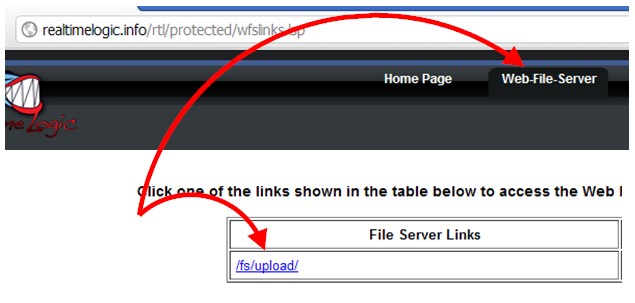
- Click the "Web-File-Server" link at the top and login.
- On the "Web-File-Server" page, click one of the links presented, i.e., one of the directories you have access to. We have access to one directory in the example image shown above.
- Right click on the WebDrive task bar icon and select "Open WebDrive".
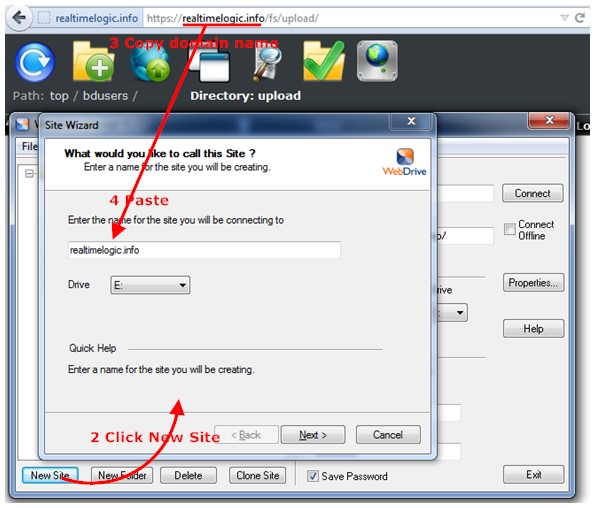
- Click "New Site" to bring up the "Site Wizard".
- Switch to your browser and copy the domain name from the browser.
- Paste the domain name copied from your browser into the "Enter the name for your site..." field in the WebDrive Site Wizard.
- Select desired Drive letter
- Click Next
|
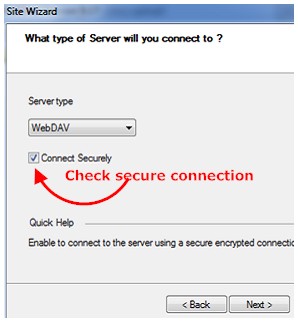
On the next page in the wizard, select WebDAV and click the check box for "Connect Securely" Click Next |
|
|
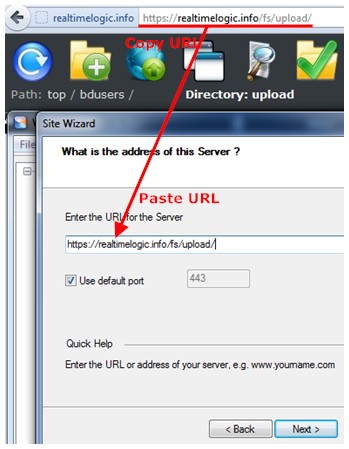
Switch to your browser and copy the complete browser URL. Paste the URL copied from your browser into the "Enter the URL for the Server" field in WebDrive. Note: make sure the url starts with https:// Click Next. Click Next on the next page in the wizard (the Certificate Settings). |
|
|
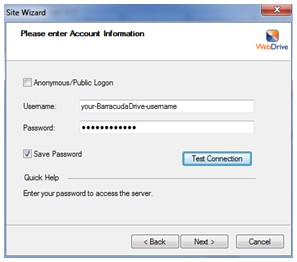
Enter your FuguHub user credentials and click the Test Connection button. The connection test should be successful if you entered the correct credentials. Close the test box and click Next. On the next page in the wizard, click finish without connecting to the server. |
|
You could at this point connect to your FuguHub server using WebDrive. Before connecting the first time, you must configure the WebDrive client for optimal FuguHub connection settings.
- In WebDrive, click the Properties button for your new site to open up the Properties dialogue window.
- Click Connection.
- Change the "Command timeout" from 30 seconds to 5 seconds.
- Click DAV and check "Enable Auto DAV locking" if you collaborate with multiple users and you edit the same documents on the server.
- Click Http Settings.
- Uncheck "Do chunked upload for large files".
- Check "Add trailing slash to directory list requests".
- Click File.
- Check "Encode filenames in UTF-8". Note: this step is required if you use non English characters.
- Check "Resume interrupted file transfers".
- Click the OK button to close the Properties dialogue window.
You have now completed the configuration process. In WebDrive click the connect button for your newly configured site to map the selected Windows drive letter to your FuguHub server.
|
|
|
This web site is powered by the FuguHub Web/Application Server.
© 2022 Real Time Logic LLC, California, USA. All rights reserved.
Powered by the Barracuda Embedded Web Server and the SharkSSL Embedded SSL Stack.