
FuguHub
Manage Data Your Way
Using NetDrive with the FuguHub server
Note: NetDrive has a problem with non English letters. We recommend a more commercial grade WebDAV client such as WebDrive if you use non English letters in file names.
The following instructions are for: installing and configuring the NetDrive WebDAV client for connecting to your FuguHub server and for assigning a drive letter on your PC to your FuguHub server.
- Download and install NetDrive.
- Use a browser and navigate to your FuguHub server. We use realtimelogic.info in this example. You cannot use this server; you must navigate to your own server or the server you have been assigned to.
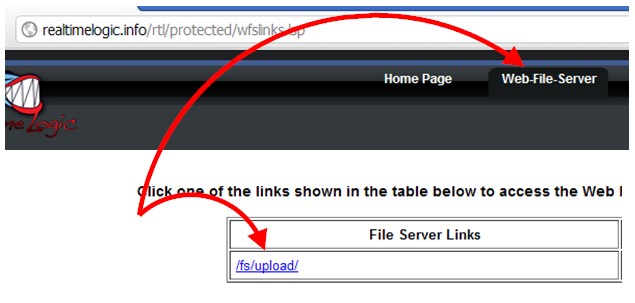
- Navigate to the internal FuguHub user interface, e.g., https://your-domain-name/rtl/
- Click the "Web-File-Server" link at the top and login.
- On the "Web-File-Server" page, click one of the links presented, i.e., one of the directories you have access to. We have access to one directory in the example image shown above.
- Start NetDrive
- Click "New Site"
- Enter a name for the connection
- Click Server Type and select WebDAV
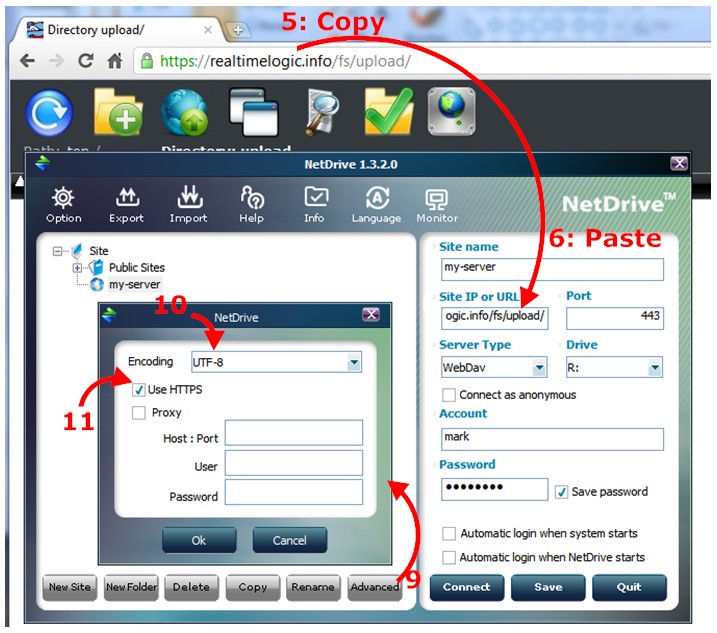
- Switch to your browser and copy the browser URL from the FuguHub Web File Server
- Paste the URL copied from your browser into the "Site IP or URL" field in NetDrive. Note: make sure the url starts with https://
- Click the Account field and enter your FuguHub username
- Click the Password field and enter your FuguHub password
- Click advanced
- Select UTF-8 as the encoding
- Click "Use HTTPS"
- Click OK: The port should change to 443
- Optionally click "Automatic login when system starts" or "Automatic login when NetDrive starts"
- Click Save
- Click Connect
|
|
|
This web site is powered by the FuguHub Web/Application Server.
© 2022 Real Time Logic LLC, California, USA. All rights reserved.
Powered by the Barracuda Embedded Web Server and the SharkSSL Embedded SSL Stack.