Mapping Windows 7, 8, or 10 to a WebDAV server
If you are a programmer, check out how to create your own FuguHub applications and the technical information on how the FuguHub WebDAV server instance works.
The following instructions are for connecting a Windows 7, 8, or 10 computer to your FuguHub server and for assigning a drive letter on your PC to your FuguHub server.
|
How to fix Slow WebDAV Performance in Windows 7 and 8:
|
We are using a non secure URL in the following example e.g. a URL that starts with http://. You can use a secure URL with the integrated Windows WebDAV client, but this requires that you have purchased a valid SSL certificate for your server. The Windows WebDAV client will not let you connect using a secure URL if you do not have a valid certificate. If you are required to use a secure URL, do one of the following: Use the NetDrive or WebDrive WebDAV client or use our SSL certificate wizard and install a valid SSL certificate for your domain name.
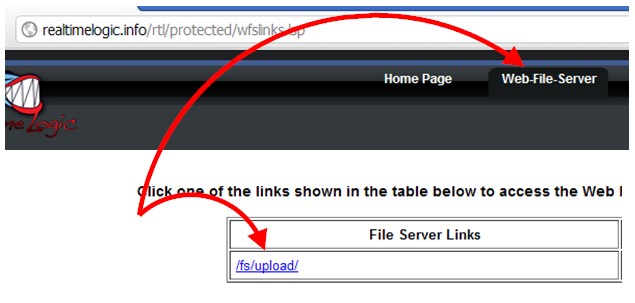
Use a browser and navigate to your FuguHub server. We use realtimelogic.info in this example. You cannot use this server; you must navigate to your own server or the server you have been assigned to.

- Navigate to the internal FuguHub user interface, e.g., https://your-domain-name/rtl/
- Click the "Web-File-Server" link at the top and login.
- On the "Web-File-Server" page, click one of the links presented, i.e., one of the directories you have access to. We have access to one directory in the example image shown above.
|
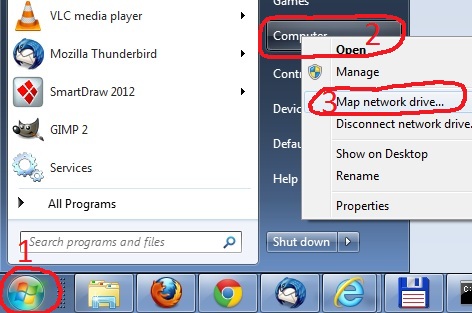
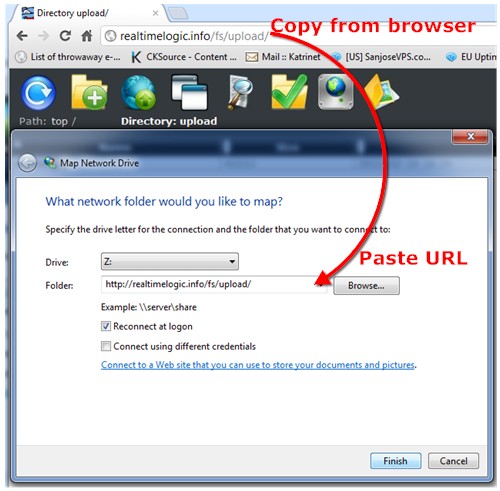
Open the Windows "Map Network Drive" dialog as follows:
|

|
|

|
|
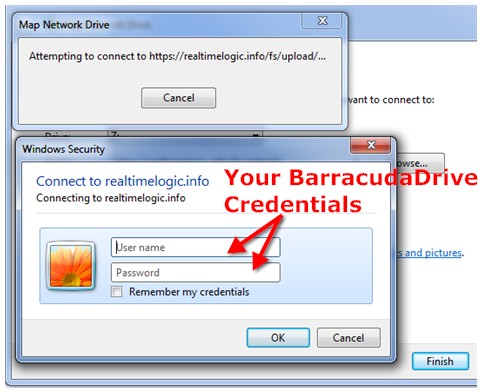
A Windows Security Dialog will appear after some time.
|

|

